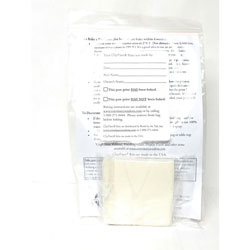
Paw Print Kit-Clay
+ Save on each recurring order!
- Perfect as a gift or memoralization
- soft, non-toxic modeling clay
- Pet Owner's Tip Sheet providedon how to obtain deep paw impressions, how to bake and how to decorate the ClayPaw.
Description
Paw Print Kit - White Clay Kits contain a 4-oz. patty of soft, non-toxic modeling clay in a plastic storage bag with a Pet Owner's Tip Sheet providing suggestions about how to obtain clean, deep paw impressions, how to bake and how to decorate the ClayPaw.
Benefits
- Perfect as a gift or memoralization
- soft, non-toxic modeling clay
- Pet Owner's Tip Sheet providedon how to obtain deep paw impressions, how to bake and how to decorate the ClayPaw.
Directions
Clean hands and paws! This modeling compound attracts fur, dirt and ink.
Recruit help. Some pets have sensitive paws and resist print making. One person can gently restrain the pet while the other makes the print.
Adults should assist children when making and decorating paw prints.
Knead the clay for several minutes until soft and warm. DO NOT soften in a microwave oven as this may 'harden' the clay.
Roll clay into a ball and place on hard, clean smooth and portable surface (dinner plate, plastic clipboard or a Portable Patty Pad with a Circle Mold).
Flatten ball into a patty and turn over to reveal smoothest side.
Lift the portable surface to the pet's paw and center the paw on the clay.
Firmly, but gently, push the center pad of paw into the clay and , without removing paw, press each toe pad and nail/claw into the clay.
If print does not meet your standard. start over and try again.
To Decorate a Paw Print Before Baking
If you wish to make a Clay Paws print hanging ornament, make one or two small holes using a match stick or crochet needle near the top center of the patty prior to baking. Be sure the opening is wide enough to pass a ribbon through.
Add a pet's name by using a toothpick, Stylus, or Alphabet Stamp Kit to carve or imprint letters.
Add decorative items like beads, collar tags or pre-baked charms ... arrange and press items into clay prior to baking. (Note:Decorations used must withstand oven temperatures of 275° - 295°F.
Ingredients
Clay Terra Cotta


